Tumbling Tutorial

This is my tumbling setup. I have a few double barrel and a few single barrel 3 pound tumblers. I put these on an inexpensive bookshelf I purchased from Amazon (link below). A yoga mat was cut to use as a layer of protection. It also absorbs the vibration and reduces the noise somewhat. I have most of my tumblers elevated on wooden blocks in order to provide more air flow to the motors. They tend to run hot.
You may notice I tacked a disposable tablecloth to the wall behind my tumblers. I’m glad I did that. It protected my walls when I had a blowout. I also bought some 3 in 1 oil that I use to keep the tumblers running smoothly. Also, I used some leftover craft puff paint to label my barrels. This helps me keep track of what’s in specific barrels. I sleep in the same room as the tumblers. The white paint helps me to see that all are running perfectly while it is dark.
Link for maintaining tumblers is below.
Note to self: I need to replace my tablecloth with a bigger one to protect my wall better 🙂
You may want to search YouTube for some rock tumbling videos. We all have different methods, but they are all pretty much the same. I suggest you search the following accounts:
- Theo Kellison
- northerseclusion
- Meminer
- Michigan Rocks
- Lance Dean
Materials Needed for Rotary Rock Tumbling:
- Rock tumbler
- Rocks of Mohs hardness 5 and above
- Various r ock tumbling grit
- Kitty litter (inexpensive, non-clumping)
- Plastic colander
- Ceramic tumbling media or pea gravel
- Borax
- Ivory bath soap bars
- Some type of note pad for keeping notes
A: Gather Rocks
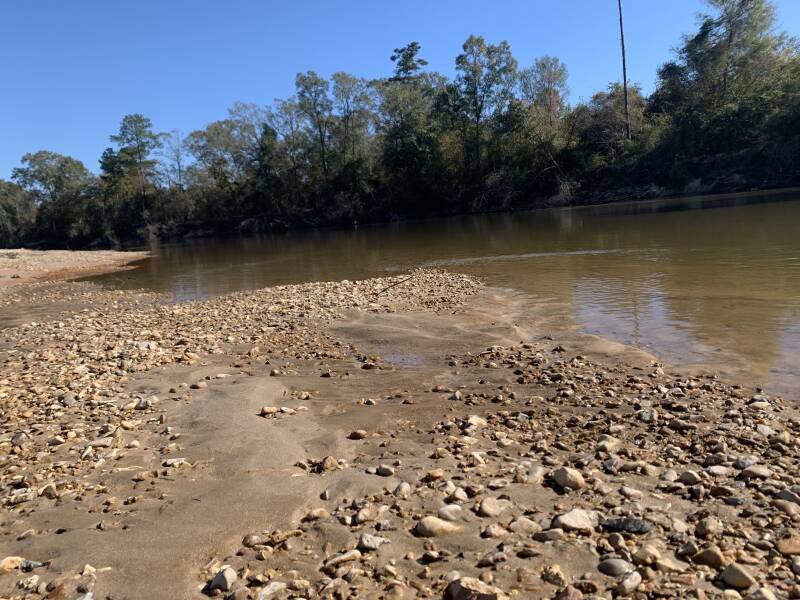


- My local river has a great rocky beach. My first place to look is in the water. Wet rocks are a good indication of what rocks will look like tumbled. You may want to bring a spray bottle with you when rockhounding. File your bottle with water if you are near dry rocks (such as while you are on a hike or some other nature walk.
- If a rock looks interesting, pick it up. If it is porous and dries quickly, it will likely not be a good rock for tumble polishing. Rocks that stay wet longer will usually take a good polish.
- It is best to look for rocks that are dense (without voids and pore spaces), free of fractures, and have a smooth texture. https://rocktumbler.com/tips/rocks-for-tumbling/
- It’s much more fun to tumble rocks you find yourself. Sometimes that’s not possible. You may need to purchase rocks to tumble. I suggest tumbling jaspers or agates if this is your first time tumbling. Go to Amazon or eBay and search “rough jasper”, “rough agate” , or “tumbling rough” and see what’s available. The Rock Shed is also a great online option.
- Check the Facebook page Rock Sale at Roseberry Farm if you are interested in purchasing rocks in person. They have sales in Clinton, Louisiana at different points throughout the year.


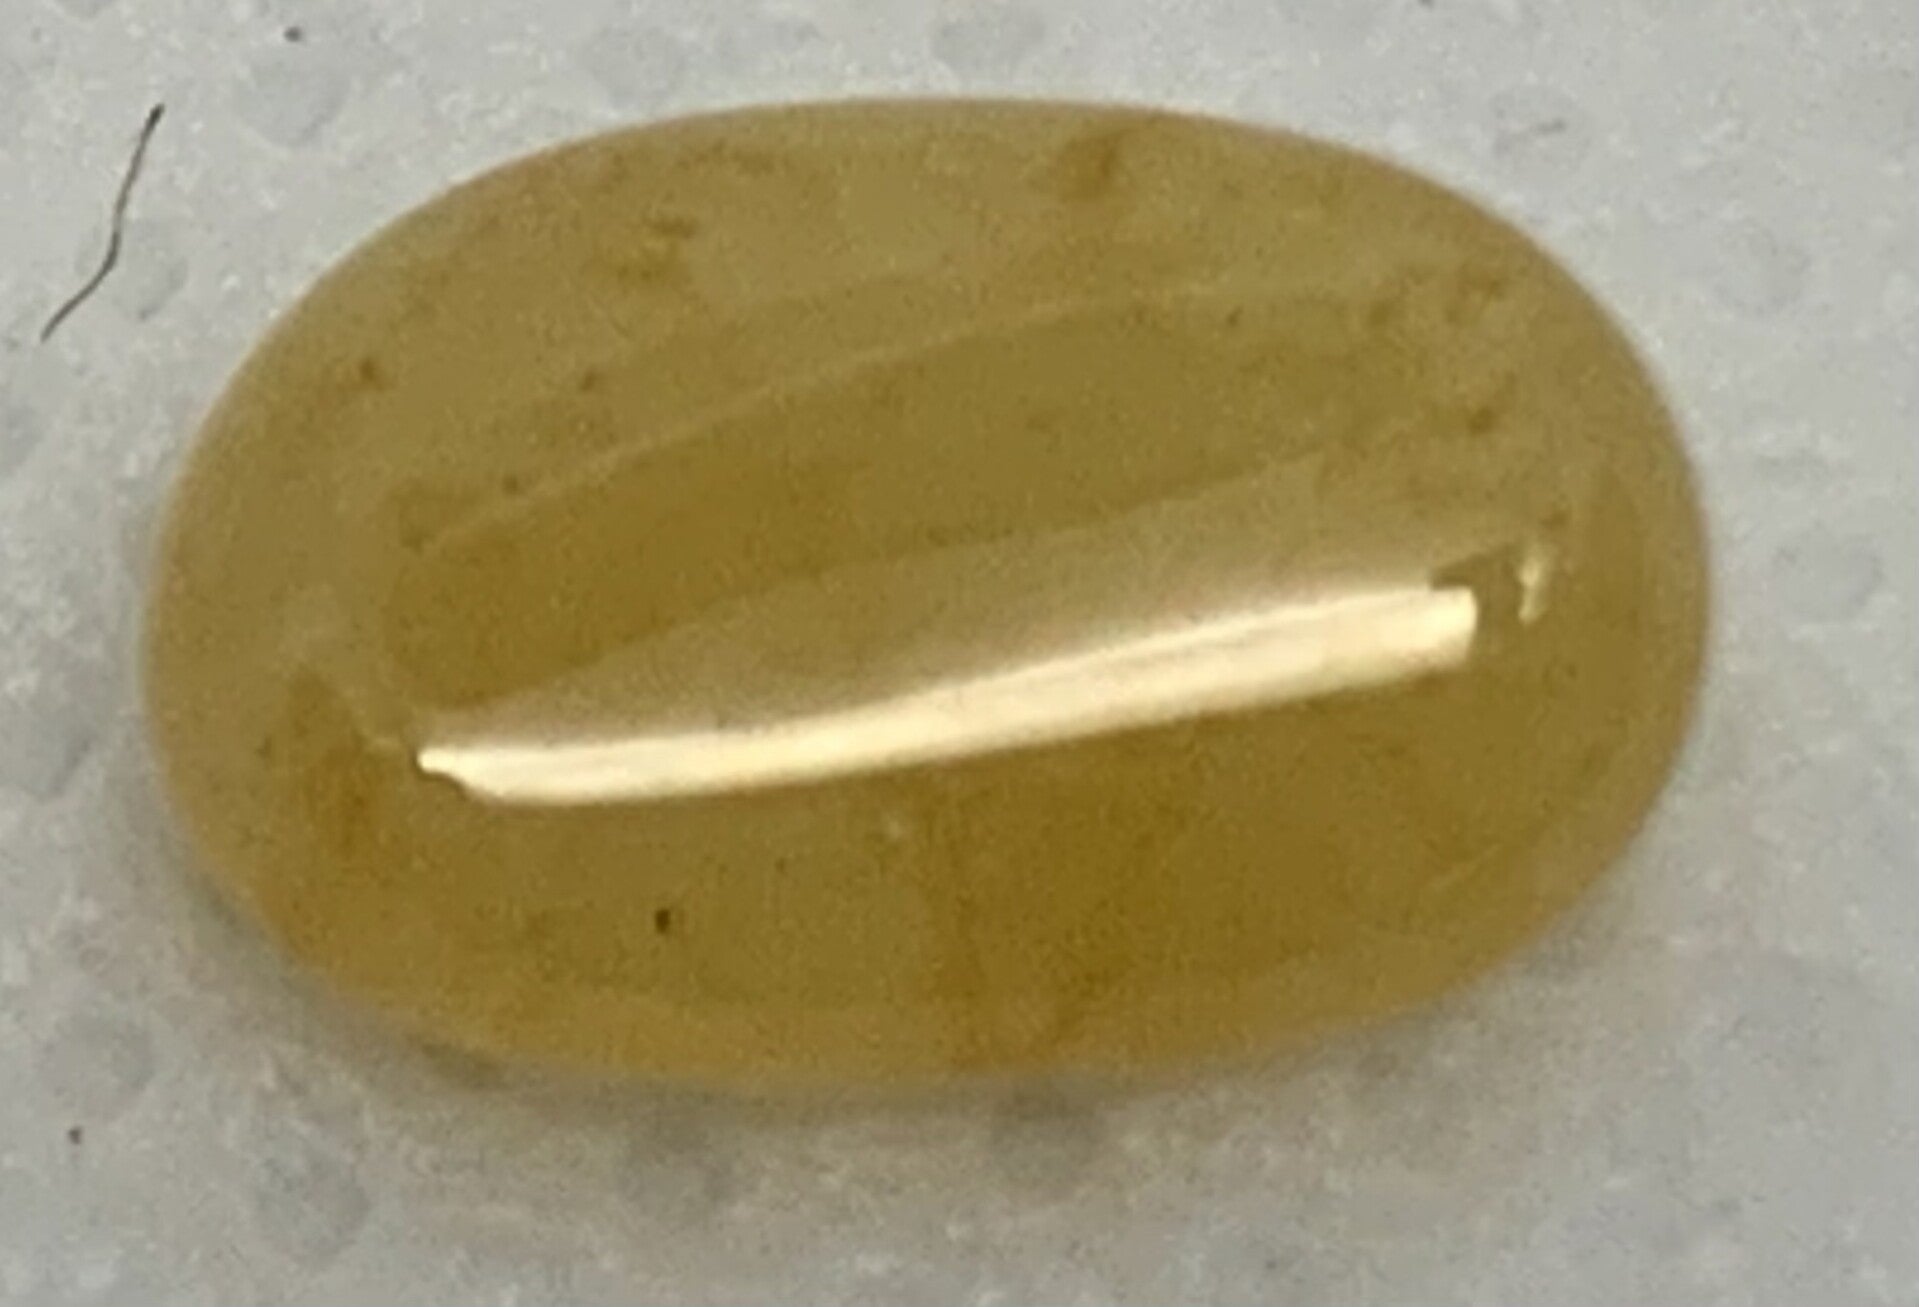
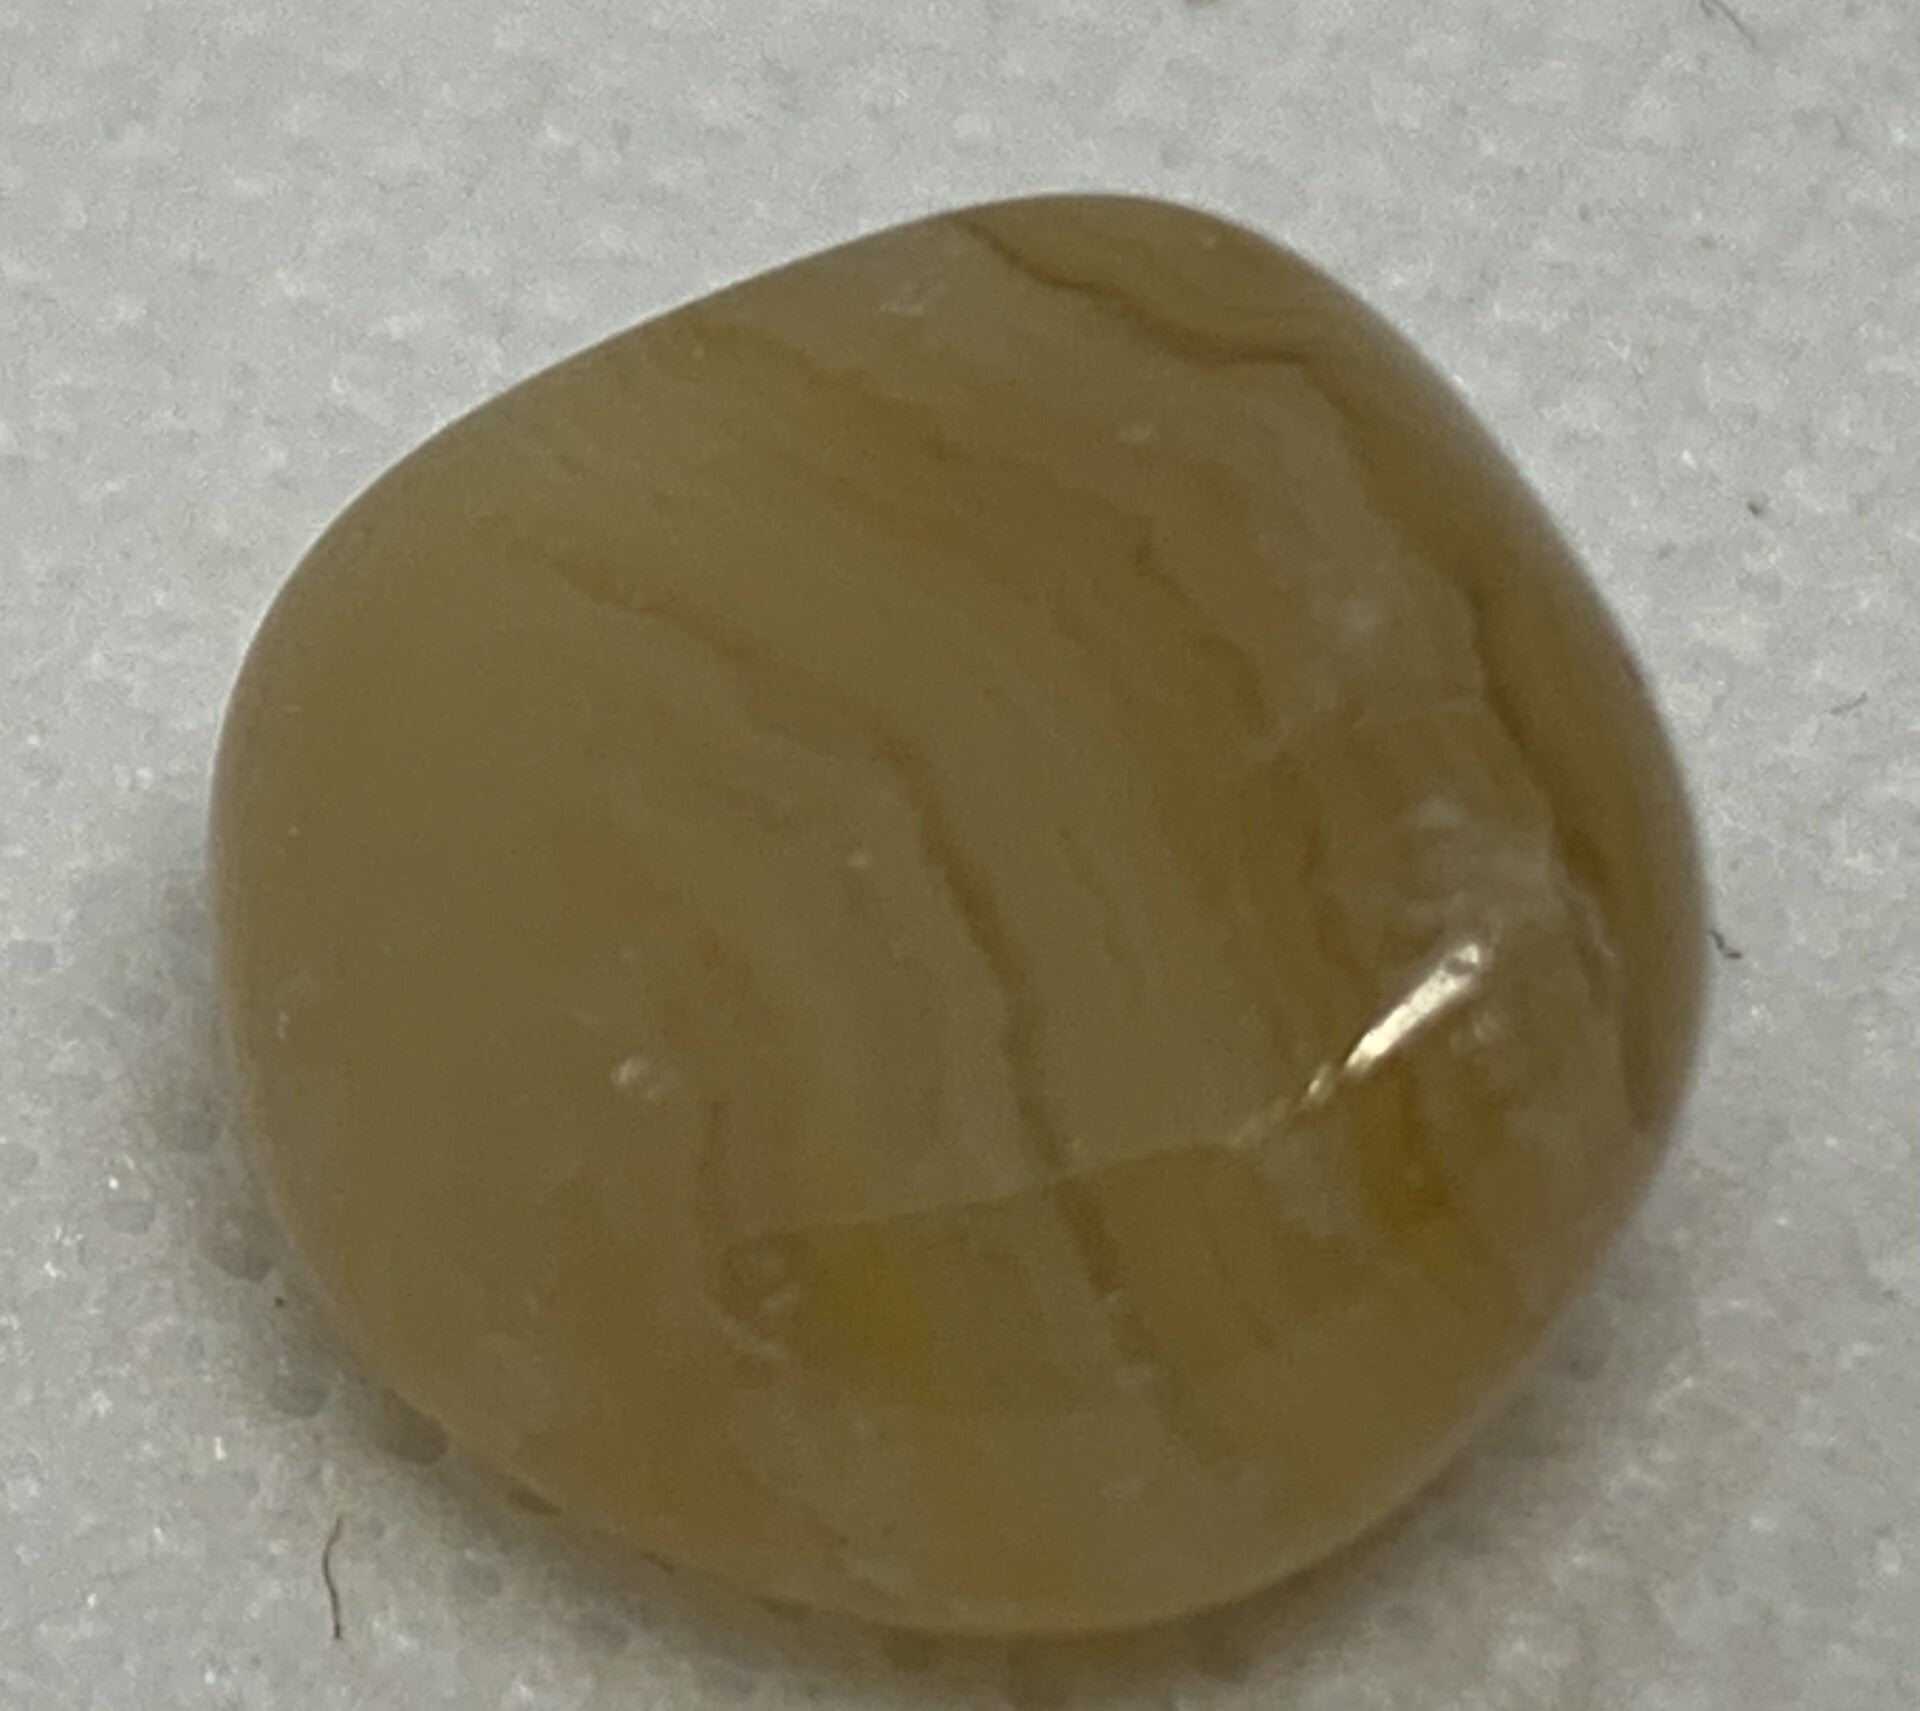
- When I’m searching for Crowley Ridge agates, I like to walk facing the sun. The sunlight illuminates them differently than other rocks. They have a sort of glow about them.


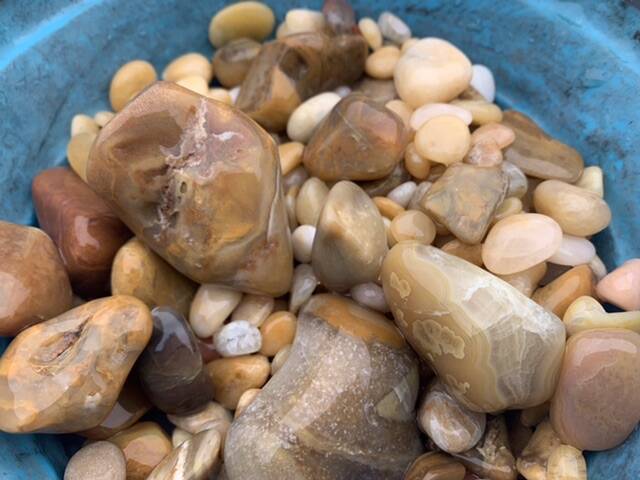
- Look at the two photos above. The light caught this rock just right. I noticed the “eyes” of the agate.
- After splashing a little water on it, I could see the banding. This rock is a great specimen.

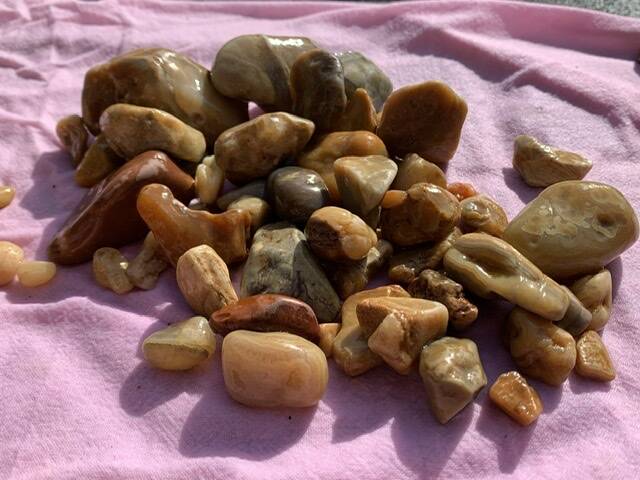
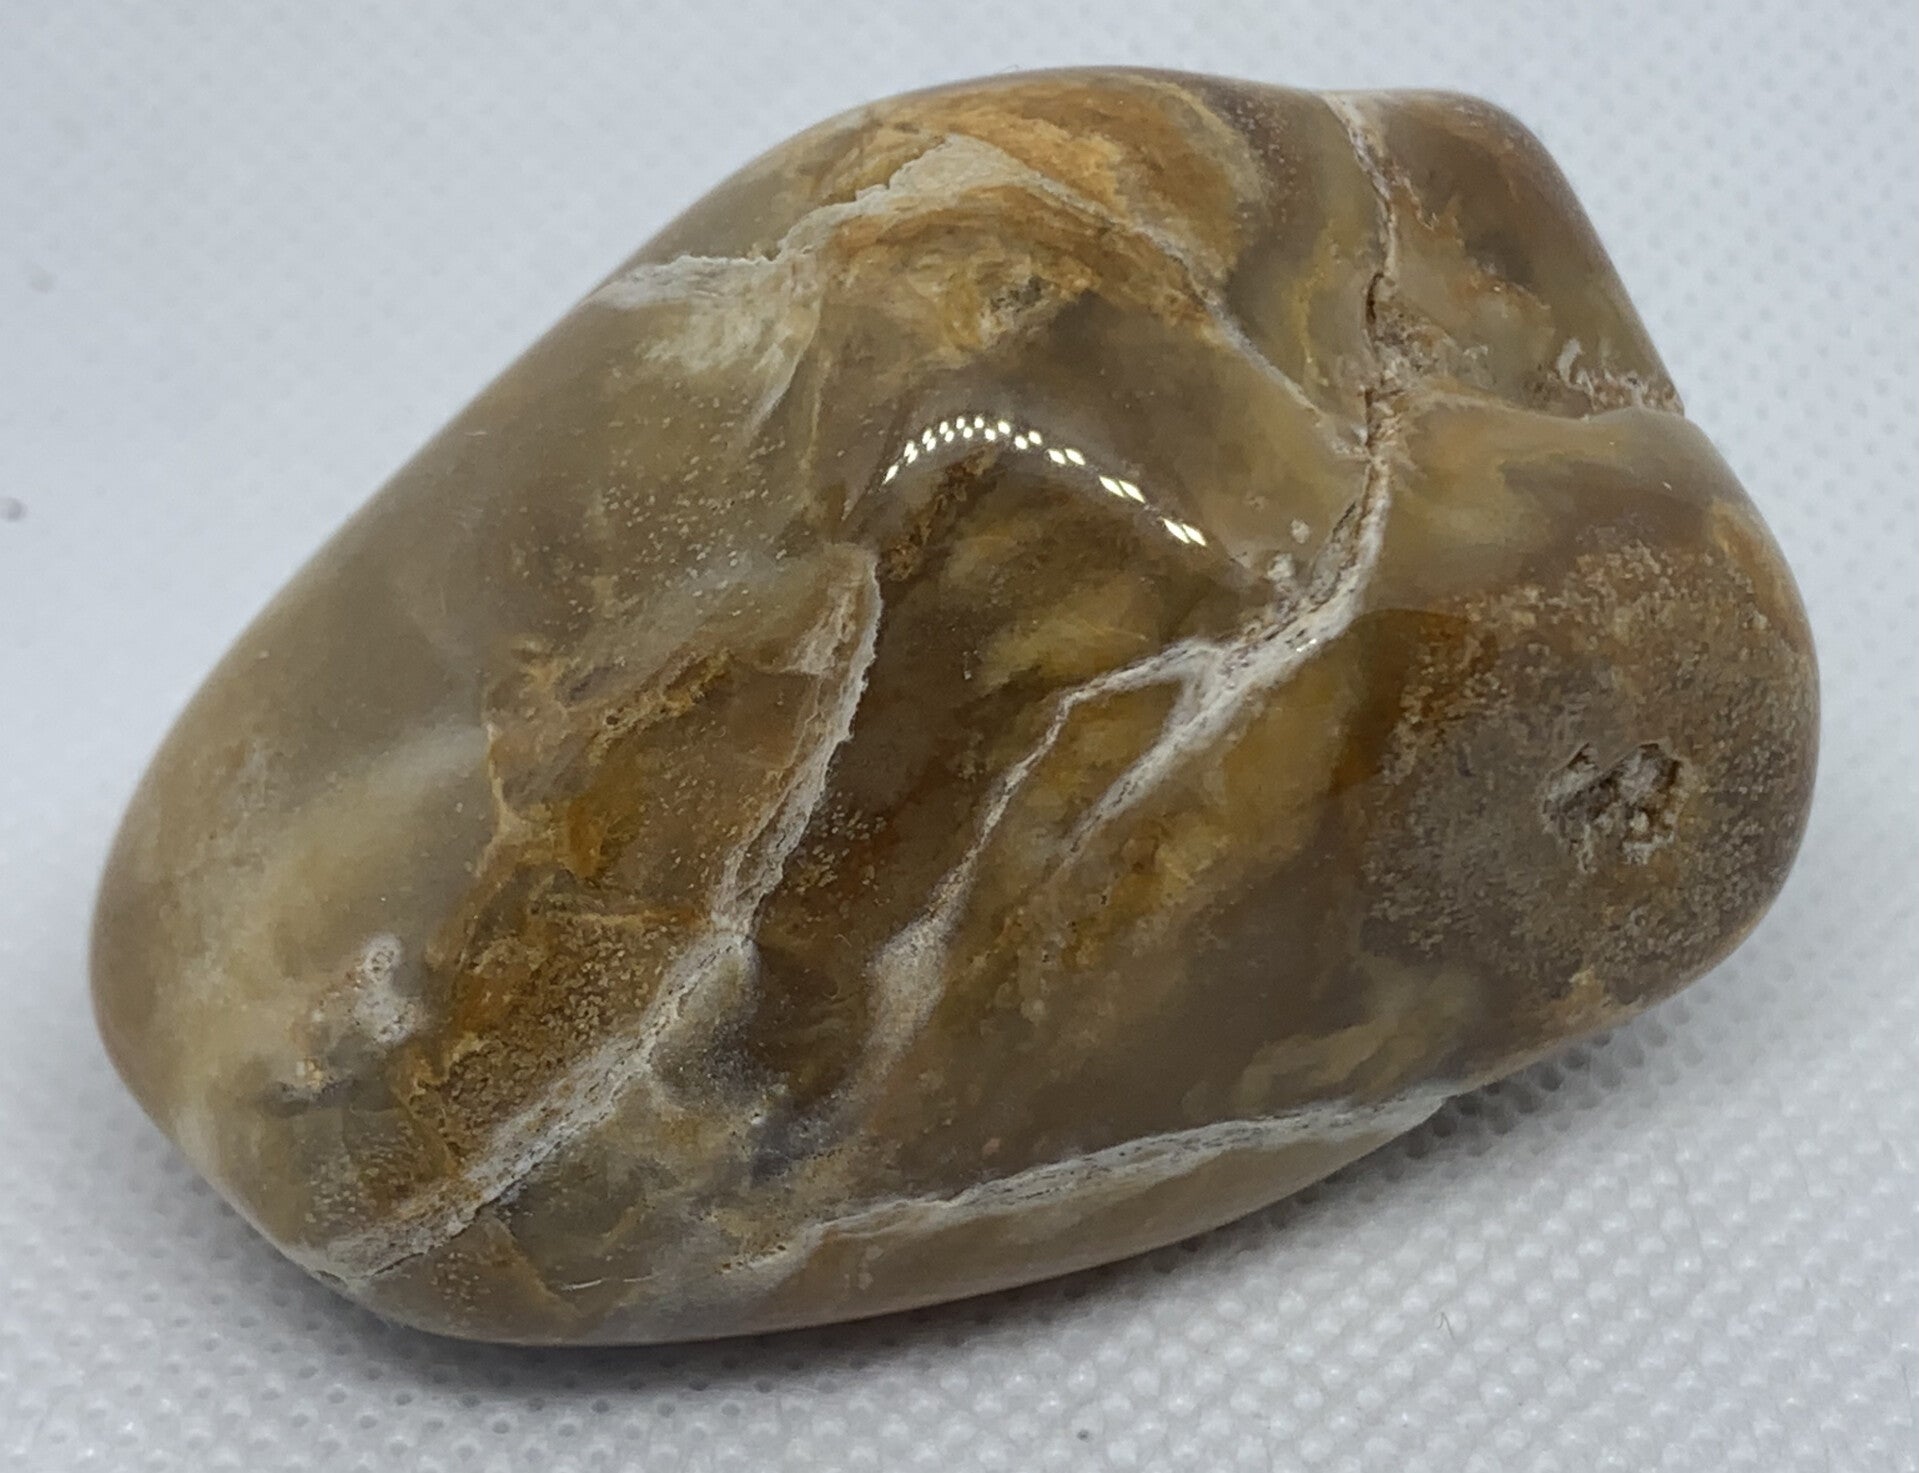
- These are the rocks I brought home. I will tumble them all except for the big brown one with a tiny rock trapped inside. It has fossil imprints. I don’t want to tumble that away.
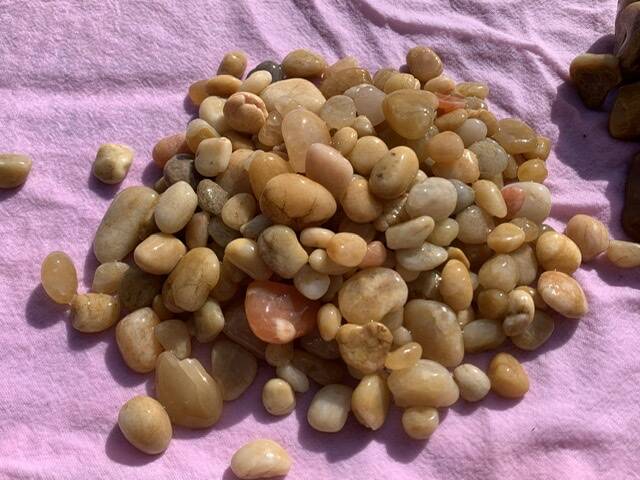
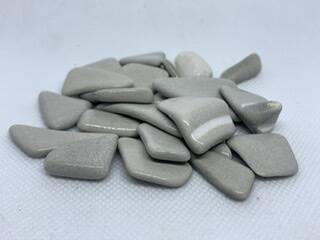
- Beside agates and some chert, I gathered some pea gravel. I use it as filler in my tumbler barrels. They shine up to a super finish so that’s bonus.


B: Stage One-Coarse Grind (60-90)
January 1, 2021
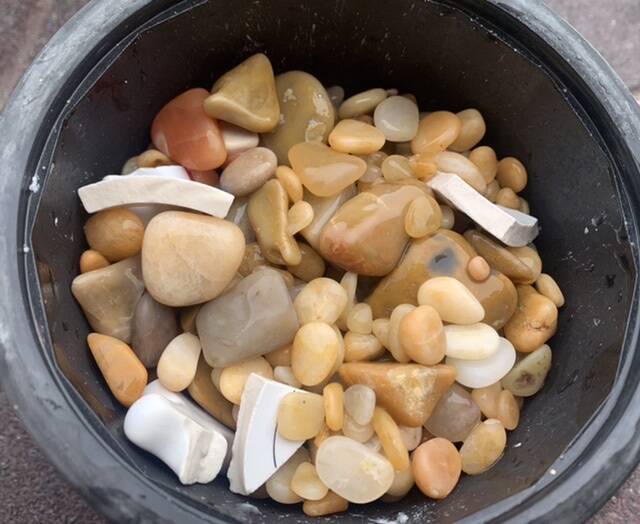
To begin my tumble I picked the rocks I was interested in polishing. As a general rule, you want to start with your barrel filled 3/4 of the way with a variety of sizes. Also, you want all of your rocks to have similar hardness on the Mohs scale. In this tumble there is chert, agate, and quartz. They are all around 6.5-7 on the hardness scale. The rocks pictured above and to the left are the ones I picked out to tumble for this tutorial. When I put it in the barrel I realized I needed more small rocks to add a variety of sizes. Also, my barrel wasn’t full enough. I decided i would need to add some quartz “jellybeans” as filler.
*If I didn’t have those small quartz pieces, I could have used ceramic tumbling media instead.

These are some of the more interesting rocks that are going into the tumbler today. These are all Crowley Ridge agates. The banding usually comes out really nice after tumbling. Sometimes the more crystalline areas do not take a shine like I would like. I have a fix for that though. Stay tuned! 😊

For stage one, I put one tablespoon of grit per pound of rocks. This is a three pound tumbler so I use 3 tablespoons of grit. Stage one grit is 60-90 silicon carbide. I also add 2 tablespoons of regular non-clumping kitty litter. The kitty litter is just clay. It thickens the water mixture (slurry) and helps carry the grit while tumbling.
I don’t weigh my rocks or really measure amounts. Some people do. I have not found the need to be precise. We are not baking a cake 😄. Also, you may read that grit needs to be added after the rocks. Not true. It doesn’t matter. The tumbler will mix it all up no matter what order you loaded the barrel.

Next I added the rocks I wanted to tumble. This is where you take a good look at how full the barrel is and make some decisions. As I stated above, this load had two small problems. The barrel wasn’t 3/4 full and there wasn’t enough variety of rocks. It needed more smalls.

I added more rocks to bring the barrel up to 3/4 full.
Throughout all of your tumbling stages, your barrel should always be between 3/4 and 2/3 full. You should always begin stage one at 3/4 of a barrel full of rocks.

The next step is to add water just to the top layer of rocks. Do not cover your rocks. If you overfill, your slurry will be too thin and you won’t get good tumbling action.
I like to use very warm water. It creates a little vacuum and helps the lid stay on. I’m not sure that’s necessary but that’s what I do.
Now put the lid on and place the barrel on your tumbler.
And now we wait! This is the hardest part. I run my stage one for about 12 days. That’s because I turn my tumblers off when I go to work. Most people run theirs 24/7 and their stage one is 7-9 days. After 12 days I will rinse the rocks off see if they are ready for the next stage. I almost always run stage one two or three times.
January 13, 2021
This morning I woke up bright and early before virtual learning lessons. I am virtual from home today, by the way. I pulled my tutorial barrel and took a few photos for you.
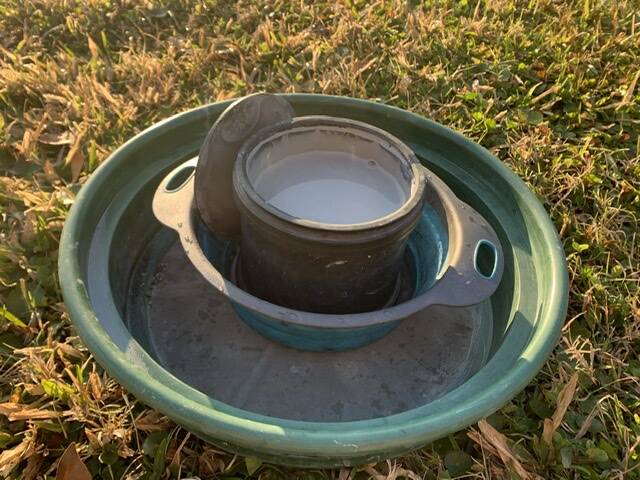
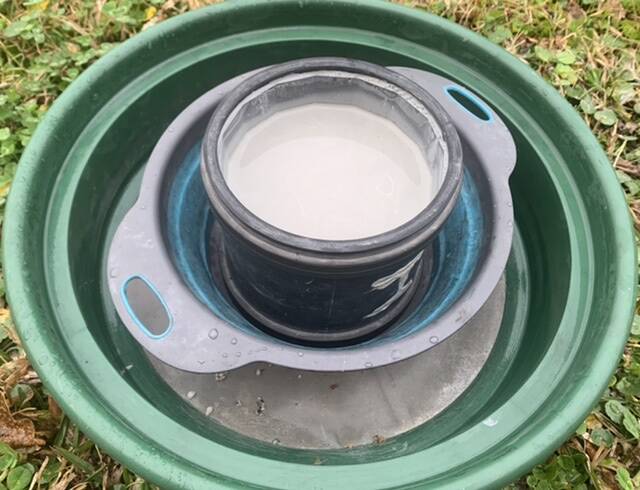
I took the barrel outside in a colander. FYI: any colander works fine. Experts say to stay away from metal because it can scratch rocks. Mine is a made of plastic and silicone. I go the extra step of putting the barrel and colander in another mesh separator. It catches any unspent grit so I can reuse.
NEVER, NEVER pour this mixture down your drains. It can set up like concrete in your plumbing.
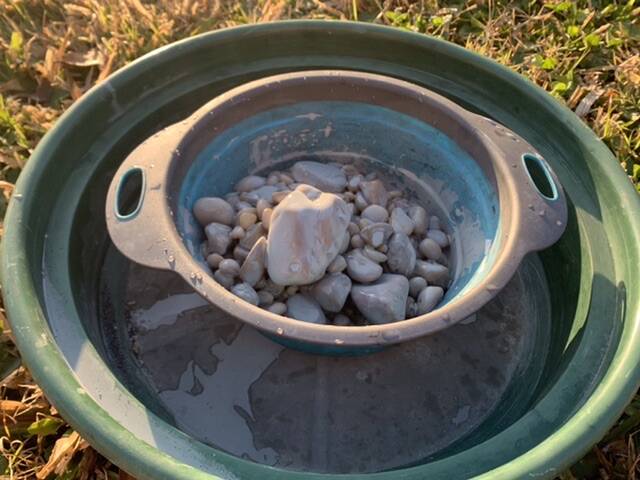
Pour the contents of the barrel into your colander. If it is winter and you live in a cold weather climate, you can do this step inside over a 5 gallon bucket. The green separator is made to fit on a bucket perfectly.
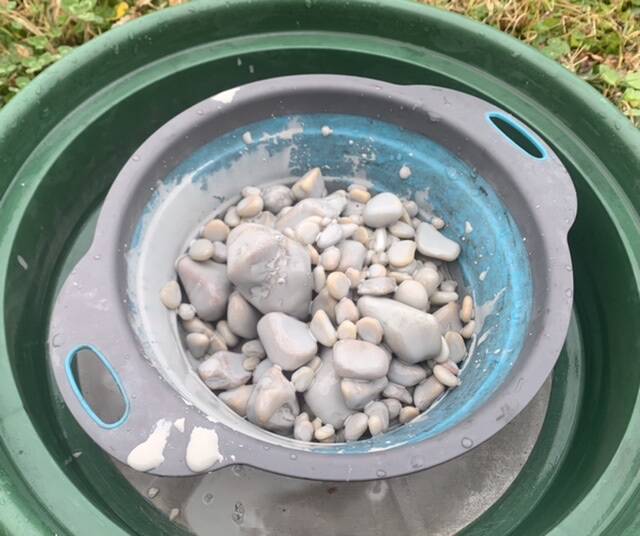
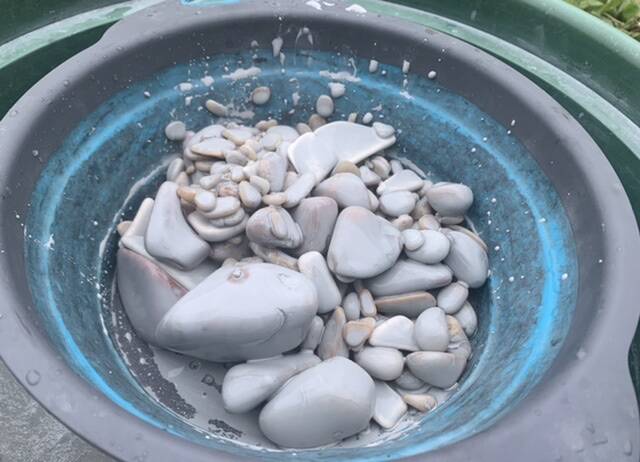
Rinse the rocks of grit and slurry with water. You will see in the photo some of the rocks still have a little slurry in cracks and points of the rocks. We will take care of that soon.
After rinsing the rocks, be sure to take an old toothbrush or denture brush and scrub the inside lip of the barrel to clean the slurry from that area. If it’s not cleaned out, it could prevent a tight seal of the lid and can also contaminate the next stage.
Put the rocks back into the barrel with about 2 tablespoons of borax. I use 20 Mule Team borax which is found on the laundry soap aisle of the grocery store.
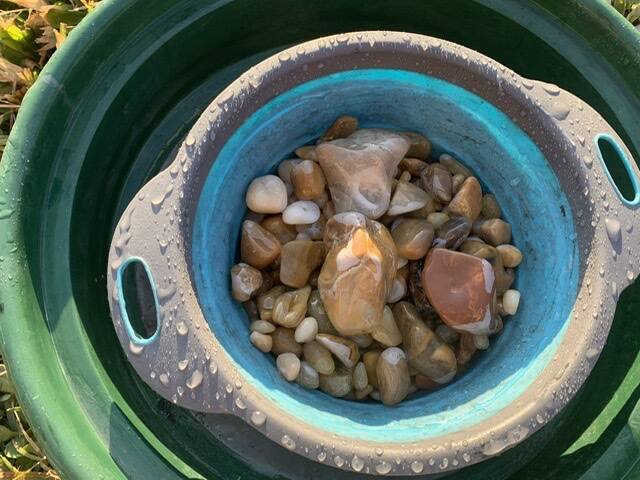
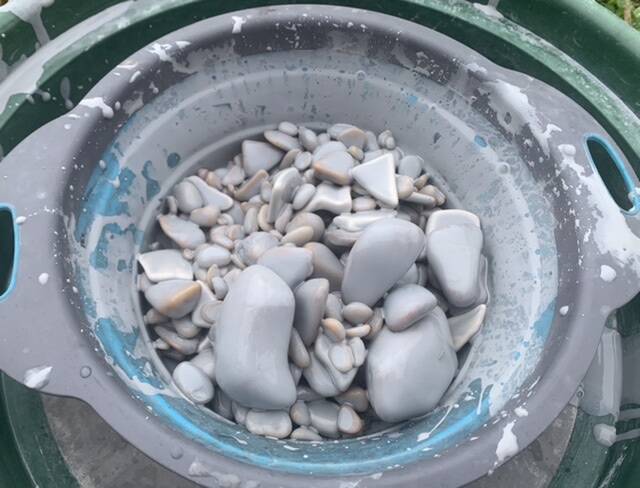
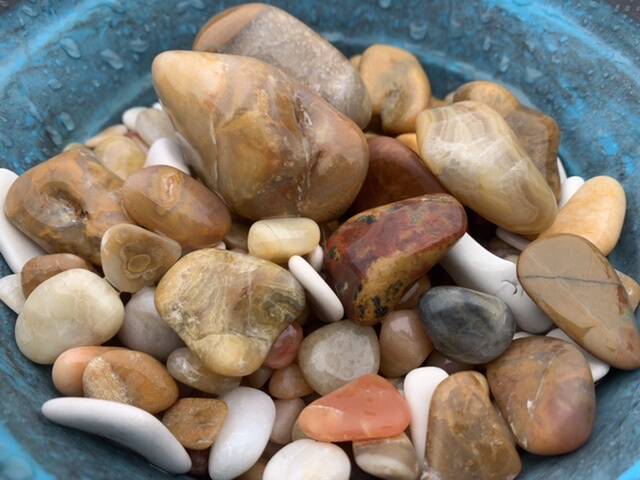
Add water to the top of the rocks and let roll on the tumbler for at least 1 hour. This will clean the rocks and the tumbler barrel for the next step. This photo was taken after a borax wash and clean water rinse.
Note: Some people scrub each rock with a toothbrush to clean them. I’ve never found that necessary.
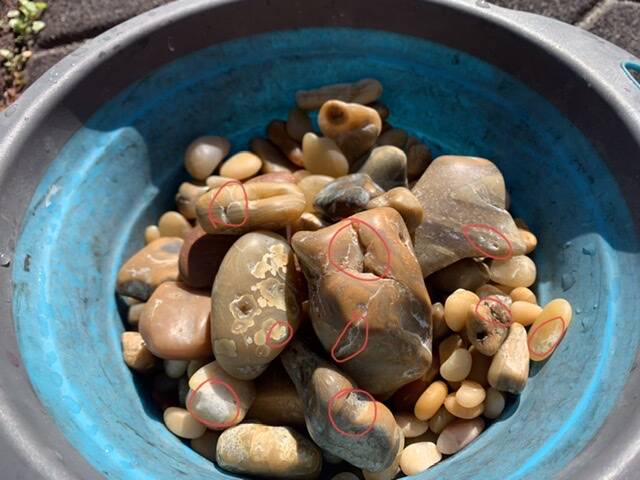
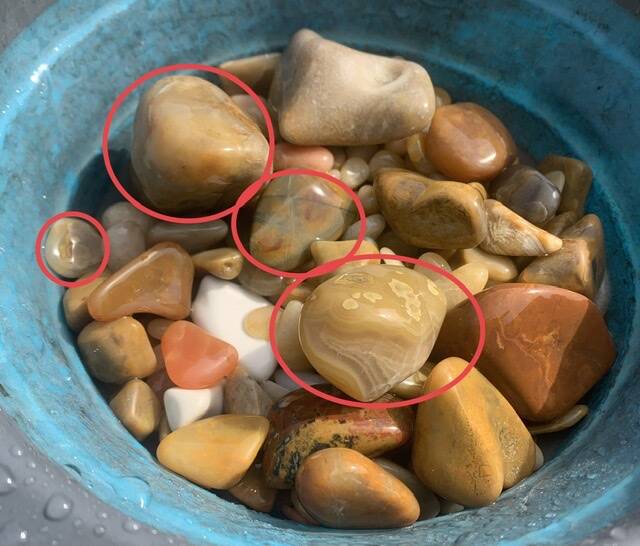
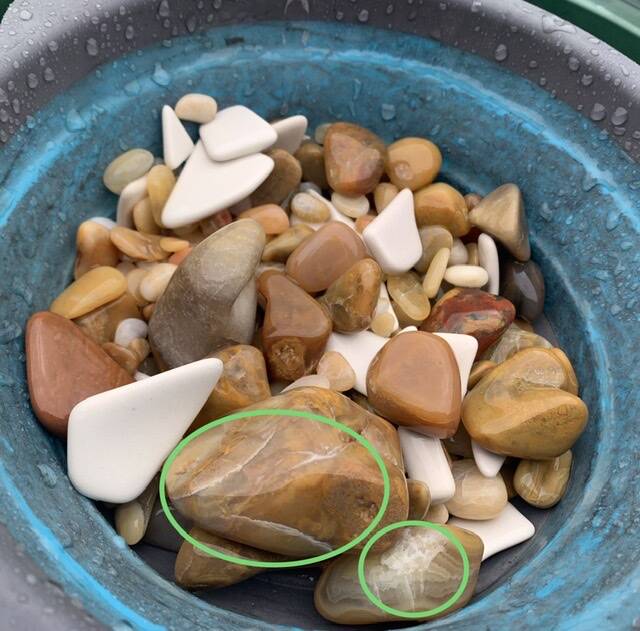
I let these rocks dry somewhat to show you some imperfections. The areas on the rocks circled in red are indicators that the rocks are not ready for stage two grit. There are still cracks and rough areas.
As I stated earlier on this page, I almost always do stage one at least twice. (The exception would be for rocks which are much softer. They don’t need as much time in stage one.). I put these rocks back in the barrel with 60-90 silicon carbide and a couple tablespoons of kitty litter. Fill to top of the rocks with water and roll for another 7-10 days.
C: Stage 2-Medium Grind (220)
January 24, 2012
Stage 2 begins after you are satisfied with the basic shape of the rocks and they are relatively free of cracks and vugs (cavity in a rock). This is how I got ready to begin stage 2.
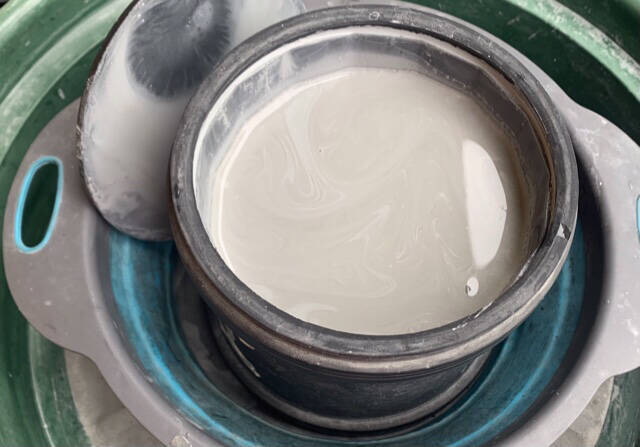
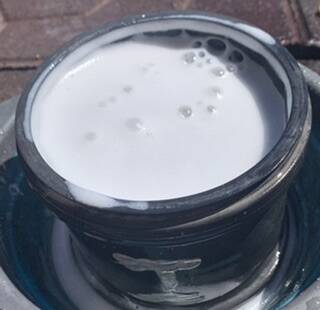
I took the barrel off of the the tumbler after it ran on stage 1 for a second time. Right off the bat, I was a little disappointed in the slurry. I like it to be a little thicker than this. This is kind of milky. I like it to be the consistency of pancake batter or melted milkshake. Thicker slurries carry the grit better. I probably put a little too much water in the barrel.
It’s important to take an old toothbrush or denture brush and clean the ledge of the barrel after emptying the barrel.
Shown here is the dumped barrel. I dump it onto the grass. Never dump down the drain of your house. It could cause plumbing problems.
Well, even though the slurry was thin, it seemed to do its job. I’d say this batch is almost ready for stage 2.
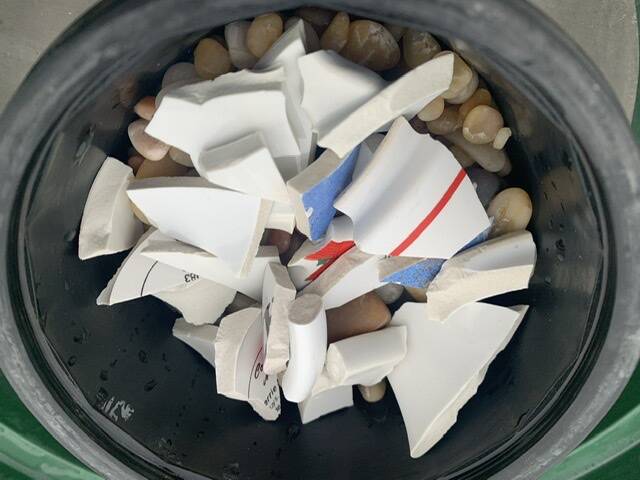
Before starting stage 2, these rocks need a borax bath. I added the rocks and about two tablespoons of borax into the barrel. I noticed the rocks had worn down a lot and I needed filler. Remember, you should always have between 2/3 to 3/4 of the barrel full of material. I added broken up coffee mugs to my barrel to make up for what was lost during tumbling. You could add pea gravel, ceramic tumbling media, or tumbling plastic.
🔆🔆Update 12/29/2023: I use exclusively pea gravel as filler now. Sometimes it gives me some pretty polished stones. In addition, I don’t have to pick out ceramic media or bits of coffee cups at the end of my polish cycle.
After adding borax and filler, I added water and put the lid back on. I let it roll on the tumbler for a little wash for an hour or so.
After tumbling in a borax bath, I rinsed the rocks. You can pour the borax water out in the home drain if you like. Be aware, if you pour the borax water outside, it will kill vegetation. I usually pour my borax water on the sidewalk cracks to kill weeds. Rinse the rocks thoroughly with fresh water.

Now for the stage 2 material. In my three pound barrel, I add three tablespoons of 220 silicon carbide grit and two tablespoons of inexpensive kitty littler (for thickening). Be careful not to get grit on the top ledge of your barrel or it may cause your barrel to leak.

Now add your rocks and filler back into the barrel. Add water until you can just see it peeking out from the bottom of the top layer of rocks. You don’t want a lot of water.
Now put the lid back on the barrel and let run between 7-10 days.
D: Stage 3 Pre-polish
February 10, 2021
The previous stage lasted a little longer because I took a weekend trip and turned the tumblers off for a few days. Pictured below is the result of approximately ten days in stage 2 where the surface of the rocks are worn down further. Think of the different grit as the numbered grit of sandpaper. You start with a low number of grit and then gradually get larger numbers which represent finer grain. The finer grain (larger number) makes objects smoother and smoother.
Here is stage two right off the tumbler. The slurry is nice and thick. I can see more rock has been worn away by how low the material is in the barrel.
I pour the contents of the barrel out to begin the washing process. This is just like previous steps.
Don’t forget to clean the barrel ledge with a toothbrush at this time.
After rinsing, I put these with a little borax and water for a quick tumble to give them a good cleaning. I poured off the borax water and rinsed them clean after an hour or two.
I circled the ones that I think will be very interesting when finished. I can’t wait for this set of rocks to be completely done. There are some beauties in here.
I put these back in the barrel with 2 heaping tablespoons of stage three grit (500 grit silicon carbide) and water to just under the top layer of rocks. I don’t use kitty litter after stage 2. I’ll let roll for 10-14 days.
E: Stage 4 Polish
February 24, 2021
I took the material out of the barrels and was happy to see a nice consistency of the slurry. Next the rocks were brought outside to rinse.
After rinsing, I looked over the rocks to assess. I’m a little concerned with the circled rocks. The cracks and fissures might not produce a nice smooth-finished rock. We shall see. Often the Crowley Ridge agates give me some problems in the crystalline areas (like in the smaller circled rock). I have a file for that. Look for the fix at the end of the tumble.
This photo was taken after a borax wash. It cleaned the rocks and the barrel to prepare for polish. I filled the barrel with about 2 tablespoons of aluminum oxide polish and these rocks. Then I filled the barrel about halfway with water. I put the barrel back on the tumbler for the final stage of tumbling.
F: Cleaning/Burnishing


March 20, 2021
Yikes! I forgot about this barrel! It tumbled about two weeks longer than I usually run in the polish stage. I guess this will be a bit of an experiment.
I took the barrel of Aluminum Oxide off the tumbler. You’ll notice the liquid looks black. That’s just on the top layer of foam. The liquid under the foam is white.
After the polish stage, I pour the rocks into a strainer which is over a cheap juice pitcher. Then I pour water over the rocks. I reserve the polish/water and set the pitcher aside. I then rinse the rocks thoroughly.
Now it’s time for another borax tumble to remove the residual polish. Put a couple teaspoons of borax in the tumbler barrel with rocks and water. Let run for about an hour.
🌟A side note about the used polish: I put the pitcher of water and polish off to the side for several days so the polish settles. When you see a layer of water on top of the polish, you can pour off the water or suction it off with a turkey baster. I allow the polish to dry out and save it in a jar to be used again and again.


The rocks were tumbled for a couple hours. One hour is enough but I got busy and forgot. I poured these over a pitcher to capture the borax water. I don’t drain the barrel over grass because borax will kill vegetation. by pouring into an old pitcher I can later use the liquid to kill weeds in cracks in the sidewalk. You can pour this down the drain if you like.
I rinsed the rocks in a colander then put them back in the barrel with about two tablespoons of a grated bar of Ivory soap and warm water to further burnish. This will be tumbled for up up to a day. There are differing opinions about the time for Ivory wash. Some do this for a few days. I’ve tumble with ivory as little as an hour and felt it was sufficient.
🌟A note about Ivory soap: It’s important to use a pure soap. I’ve read some use Fels Naptha or Zote Soap but I haven’t tried those yet. Ivory is quite economical and readily available so I’ve been sticking with that.
As far as using Ivory, you can do one of three things. You can leave the bar whole and cut slivers of the soap into the barrel. It’s also easy to use a grater or zester and grate directly into the barrel. The last way to use Ivory is my favorite. Put ivory soap bar into the microwave for 30 seconds at a time and it will fluff up. When it’s cool, crush it up with your hands and it will form a powder. Put the powder into a jar and use the soap powder for burnishing as needed.
🔆🔆 Update as of 12/29/2023: I no longer use Ivory soap to clean out after each stage. I now only use a borax wash of about 30 minutes. I wash the barrels and lid with a denture brush and then put a couple tablespoons of borax with water and rocks after each stage. You can pour this down the drain if you like. If you pour it outside, be aware that borax will kill grass or any other type of vegetation.

Above is the coffee cup shards I used for filler. I’ll save these and resume in another batch.
After a nice sudsy Ivory soap bath I rinsed off the rocks. I’m very pleased with them! They all took on a nice shine. The Crowley’s Ridge agates have some areas that didn’t shine. The crystalline areas tend to need special treatment. I’ll show you that soon. Also, I’ll photograph most rocks individually and put them at the bottom of this page in a photo album.


Add comment
Comments
This was so informative. Thank you! I learned so much. I’ve now got this pinned to my home page so I can refer to it as I go. Right now I have my first batch of rocks going. They’re on their 4th day of tumbling in stage 1.
I’m so glad you found it helpful! This is the exact reason I renew the website subscription yearly. Should you have any questions!, feel free to reach out.
Thank You! I've been a "rock hound" since 3rd grade, 62 years ago. I got a tumbler for Christmas and I'm gonna jack around and see where it goes. I love the way you express yourself and appreciate insights.
Thank you! Good luck in your future tumbles. My advice is to have patience and keep a log of your tumbles which include dates, typed of rock and type of grit (Ex: stage 1/60-90). I will be updating my tumbling instructions soon. Keep checking back. 😊
Found your page while starting my journey, and bookmarked! Question on turning the tumblers off, I thought that was bad? That the grit will harden? How long can it be turned off? Would running on timers be suggested to avoid overworking the tumbler motors?
I’ve never had an issue with turning tumblers off while I’m at work or on a short vacation. I don’t leave them off for weeks at a time though. The reason I turn mine off while I’m not home is because I worry about the possibility of fire. This is a fear of mine but everything I’ve read says the machines are perfectly safe to run 24/7.
I just finished my first tumble and the rocks didn't turn out as well as I'd hoped. After reading your instructions, I don't wonder why!! Thanks for the info - have your page bookmarked.
Thank you Deb! I think the biggest mistake people make is not washing well enough between stages. Also stage one usually needs to be run more than once.
I am in the middle of my first tumble and your page was so helpful as I plan for my second tumble! (There are so many things I didn’t do right this first time but they are already in the polish stage so I’m going to just go with it) I am bookmarking your page for the future! One question I have is what does the burnishing do for the rocks? That is one of the many terms I’m not familiar with! Thank you!!!!
Thank you, Michi. I made this tutorial because I wasn’t able to find a step by step guide when I first started. As I understand it, burnishing is simply a step to make sure your rocks are free of all previous grit or polish. My borax cleanings can be considered burnishing.
Please check back within the next few weeks for updates. I have now retired and have time to add updated information.
Thank you, Joy. Very interesting and informative. My rock tumbler will be with me tomorrow, looking forward to start using it. I shall refer to the guide often, I am sure. Your final stage stones look beautiful. Thanks again.
Thank you, Tatiana! I hope you have good luck with your tumbles. Don’t get discouraged if your first batch is not perfect. It takes time to get it right.
Any suggestions to keep edges of petrified wood form being rough looking midway thru tumbling? Am I tumbling too long, not enough water/grit? I only tumble like material together such as wood to wood or agate to agate and multiple sizes. I clean in between with dishwashing liquid or Ivory soap. Help? Also, I use a large Thumblers Tumble or my old, old Lortone Dual buckets. If I buy new again what is your recommendations? @ questions here. Thanks!
My first thought is perhaps there’s not enough cushioning in your load and the material is bruising. Maybe you need to add ceramic media or some other type of filler. Currently use pea gravel but old, broken up coffee mugs work as well.
I keep this page bookmarked and come back to it time and again for my tumbles. Thank you for such a descriptive instruction guide with pictures 😁
Thank you! Your comment reminded me I need to update a few things on this page to reflect a couple of changes to my process.
OMG finally I found something that can help me thank you for the pictures and the side notes
Thank you for this lovely compliment. I tried to include everything I needed to know when I first started.
This is so informative! I never thought about elevating my tumbler to keep the air flow. Great tip! Thanks for doing this!
You're welcome! I'm glad you found this useful.